How to Invite a Guest to a YouTube Live Stream via Browser
Can You Add a Guest to YouTube Live via Browser
If you open the standard desktop version of YouTube Studio, there is no single universal button for inviting a guest to the stream. Through the browser you can create a broadcast, set the title and description, choose visibility, connect your camera, microphone, and screen sharing. However, the feature for showing another participant on screen in the Live Control Room is not available in every scenario.
YouTube has a Go Live Together feature. It is designed for co-streaming and may only be available to certain channels or in specific versions of the app. On desktop, this option is not always displayed, so you shouldn't count on inviting a guest directly from the browser version of YouTube.
For streaming from a computer, people use a browser-based streaming studio. StreamYard and Restream Studio let you connect a YouTube channel, create a room, send a link to the guest, and bring their camera on air. The guest does not receive the channel password and does not log into your Google account. In this setup, YouTube remains the publishing platform, while guest management happens in a separate studio.
If you need full control over scenes, sources, and audio, OBS with plugins or browser sources for the remote participant is a good fit. This option is more flexible but requires more manual configuration. For a first co-stream, a browser studio is usually easier to grasp: it combines the host's camera, the guest, and the layout in a single window.
What You Need Before Going Live
First, check that live streaming is enabled on the channel. For first-time activation, YouTube may require channel verification, and enabling the feature can sometimes take a while. If the channel has a restriction on live streaming, a third-party studio won't lift it: it won't be able to send the stream to YouTube until the platform allows broadcasting.
The host will need a computer with an up-to-date browser, a camera, and a microphone. The guest only needs a device with a browser, camera, and microphone. Some studios allow connecting from a smartphone, but for a first test it's better to use a computer: on a large screen it's easier to spot which camera is selected, whether the microphone is working, and whether the permission request tab has been closed.
Before inviting, agree on the connection time, the topic of conversation, the stream duration, and the order of speaking. The guest should understand when to turn on their microphone, where to wait for the conversation to start, and what to do if the connection drops. A few pre-agreed rules noticeably reduce pauses at the start of the stream.
Headphones or headsets are recommended for both participants. If the host and guest listen to the stream through speakers, the audio from YouTube can feed back into the microphone. This will cause echo, voice repetition, and additional latency. It's best to open the stream viewing page with the sound off, and the guest shouldn't listen to the broadcast and the studio room at the same time.
How to Connect a YouTube Channel to a Browser Studio
Button names in StreamYard, Restream Studio, and other services may change, but the general process stays similar. First you create a stream and select the platform, then the studio gets permission to publish, and after that a room opens for the host and guest.
Open the browser studio of your choice and create a new stream. Select YouTube from the list of platforms.
Grant access to the correct Google account. If multiple channels are linked to it, carefully select the one the stream should go out on.
Enter the title, description, thumbnail, start time, and visibility of the stream. You can fill in these details before inviting the guest so the participant immediately understands the topic of the stream.
Open the broadcast room. It should show a camera preview, microphone settings, background or layout selection, and an option to invite a participant.
Don't confuse the studio room with the YouTube viewing page. The stream link is for viewers, while the link from the "Invite a guest" option leads to the working room. You need to send the participant the invitation from the studio. If you give them the viewing link, they'll be able to see the stream but won't connect to the stage.
After connecting, check that the stream is being created on the correct channel and in the right time zone. If you have multiple channels, a wrong selection may only be discovered right before going live. Before starting the stream, also check which visibility is set: public, unlisted, or private.
How to Invite a Guest via Link
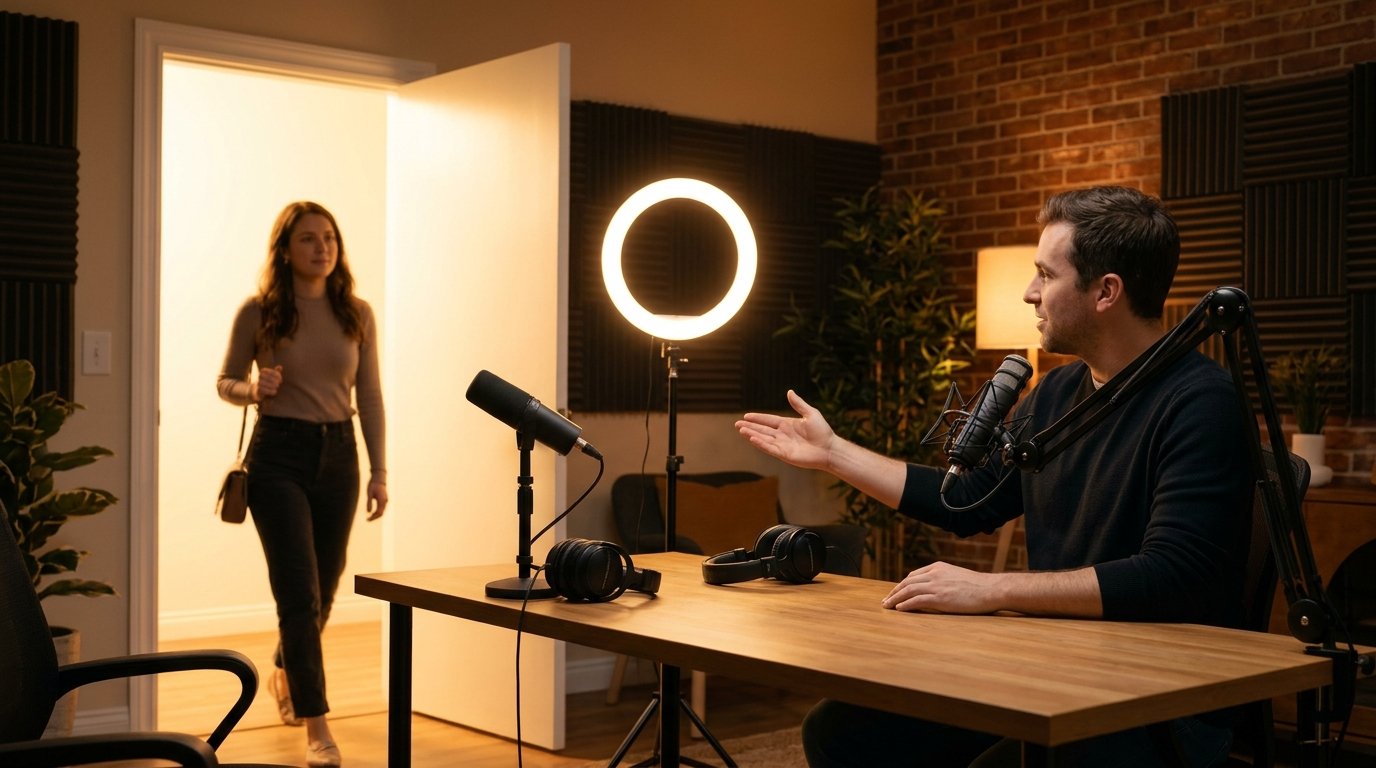
In the broadcast room, find a button labeled something like "Invite a guest" or "Add participant." After clicking, the studio will generate a connection link. Copy it and send it to the guest personally. Don't post the invitation in a public chat or post: anyone who gets the link could try to enter the room.
The guest opens the link in a browser, enters a display name, and allows access to the camera and microphone. If the browser shows prompts to use devices, they need to select "Allow." After that, the participant will see their own image and can check the camera, microphone, speakers, or headphones.
For the first connection, it's better to use a computer and close extra tabs with video calls, games, and other programs that might be using the camera or microphone. Connecting from a smartphone can also work, but on a small screen it's harder to notice the wrong audio source, accidentally enabled speaker, or a permission prompt that was left unanswered.
After joining, the guest often lands in a waiting room first. The host can see their image, but viewers don't see the participant yet. This lets you check the lighting, camera position, on-screen name, and background. While the guest is off stage, you can fix settings without publishing their image.
Ask the guest to answer a short question in their normal voice. Check whether the signal is too quiet, and whether there's crackling, dropouts, or echo. If the studio has a level indicator, rely on it rather than just your own impression in headphones. If needed, the guest can select a different microphone right in the room settings.
If the participant sees themselves with a delay, that doesn't always mean something is broken. The signal passes through the browser studio and YouTube, so the image on the viewing page may lag behind the conversation. The guest should rely on the studio room, not on the delayed stream.
How to Add a Guest to the Scene and Start the Stream
Once the participant has connected and the audio is checked, choose a layout. For a regular conversation, a side-by-side arrangement of two cameras works well. For an interview, you can make the host larger and place the guest in a separate window. If you're sharing your screen, decide in advance whether both cameras will be visible or only the speaker's face and the screen share.
Being in the room doesn't mean being in the stream. Usually you need to separately bring the guest onto the stage using a button like "Add to stream" or "Add to layout." While the participant remains off stage, they can hear the host and wait for a signal, but viewers won't see them.
Before going live, check the microphones, camera, selected layout, and on-screen text. Make sure the guest isn't showing personal notifications, documents, or tabs that shouldn't end up in the stream. If you're using screen sharing, it's best to close private messages and extra windows in advance.
After checking, click the start stream button in the browser studio. In some services, the feed to YouTube starts first, and then additional confirmation is required. Wait for a message that the stream has actually started. Don't begin an important remark right after clicking: the first seconds may involve connecting and latency.
During the conversation, the host can mute the guest's microphone, remove them from the stage, or end the connection. If the participant steps away temporarily, it's better to remove them from the layout rather than leave an empty window. If the image drops, check the browser permissions, the selected camera, and the state of the guest's internet connection.
How to Run a Test Without Going Public
You can test the guest right in the studio room without starting a public stream. Create a stream, connect YouTube, and leave the participant in the waiting room. Check the camera, microphone, layout, and screen sharing, but don't click the start stream button. This kind of test shows how the participants look inside the studio, but it doesn't check the entire signal path to YouTube.
To test the actual transmission to YouTube, create a separate test stream and set it to private visibility. In YouTube Studio, this may be "Private" or "Unlisted" mode — the exact name depends on the interface and how the stream was created. A private stream is intended for a limited set of accounts. An unlisted stream doesn't appear in the regular public list, but anyone with the address can open it.
Create a test stream in YouTube Studio and set it to private visibility.
Select this stream as the destination in the browser studio or create it through the connected account.
Send the guest the invitation link, connect them, and check the scene, audio, camera, and screen sharing.
Start a short broadcast and open the view on a second device with the sound off to check what YouTube is receiving.
Stop the test, delete it if necessary, and before the real stream check the visibility of the correct stream again.
If you use an unlisted link for testing, don't share the address publicly. You can open the link on a second device for a test viewer, but it's better to turn the sound off there. Otherwise, the voice from the viewing page will feed back into the microphone and create echo.
A private test is especially useful when using OBS. In OBS, you can build scenes, add the guest's image through a compatible plugin or browser source, set up mixing, and send the signal to a private test YouTube event. This approach doesn't replace equipment checks: each participant's permissions and connection stability need to be checked separately.
What Other Options Are There Besides StreamYard
Restream Studio works in a similar way: you connect YouTube as a platform, create a stream, open a room, and send the guest a link. The participant connects from a browser, and the host decides when to show them to viewers. Before using it, check which features are available in your chosen plan and whether the current version of the service supports the stream format you need.
OBS is a good fit if you need complex scenes, separate audio sources, overlays, transitions, and fine-tuned quality. For a remote guest, you use plugins or browser sources that send their video and audio into OBS. The guest still needs a separate connection page, and the host will have to monitor the mixer, latency, and whether the guest's audio is going out twice.
YouTube's native Go Live Together feature can be more convenient if it's available to your channel and fits your scenario. But its terms, supported devices, and button display may change. If there's no invite option in the YouTube browser, that doesn't mean something is wrong with your channel: co-streaming may only be available through a supported mobile scenario.
Third-party studios have a limitation: an extra processing step appears between the participant's camera and the viewer. The signal first goes into the browser room, then is sent to YouTube, so latency may be more noticeable than with direct broadcasting. It depends on the service, stream settings, browser, and connection quality. This is important to keep in mind for chat questions, polls, and conversations where participants need to react to each other quickly.
What to Check If the Guest Can't Connect
If the link doesn't open, first make sure it was copied in full and wasn't truncated by the messenger. If the room is recreated, the old link may stop working, so send the guest a new address from the current session. They need to join via the invitation link, not the YouTube page link.
If there's no camera or microphone, check the site permissions in the browser's address bar and the operating system settings. Close programs that might be using the device. Then refresh the room page and select the correct camera or microphone again. The guest shouldn't open multiple copies of the room in different tabs: this can lead to the wrong device selection and duplicate connections.
If there's echo, mute the sound on the YouTube viewing page and ask both participants to use headphones. If the voice drops out, reduce the load on the computer, close unnecessary tabs, and check the connection. With a weak internet connection, it's better to disable optional screen sharing and avoid connecting extra devices to the room.
If the stream is already live, don't send the guest channel login credentials and don't share the stream key with them. For regular participation, an invitation from the studio is enough. Access to YouTube Studio, channel settings, and payment data should remain with the owner or with users they've officially granted it to.
Quick Step-by-Step Summary
Check that live streaming is enabled on the YouTube channel and there are no restrictions.
Connect YouTube to StreamYard, Restream Studio, or set up OBS with a suitable guest source.
Create a stream, select the channel, and set the desired visibility.
Open the room, click "Invite a guest," and send the link personally.
Check the camera, microphone, headphones, layout, and latency.
To test the signal first, use a private test stream, then start the public broadcast and add the guest to the scene.
Last Articles
What has changed in design and functionality We have updated the website to make working with it faster and more convenient. The main changes affect ..
Good afternoon, I've collected all the news during this time.: 1. The main news is that prices for twitch viewers have been greatly reduced, while Tw..
1. Use promo code "December2025" for a 15% discount for all our viewers2. We have reduced the base prices for our configurator and the most affordable..
Twitch services are working stably, so we are ready to cooperate with squads, resellers, service owners, bot owners, and many others.Individual te..
We have completely updated our Twitch viewer services, and they are now working stably. We only use high-quality IP addresses for the viewers.The ..
Hello everyone! Today, we are announcing a new feature—"Twitch Viewer Configurator". Now, you can customize any plan for your Twitch channel. Choo..
Greetings, I have compiled a guide for streamers, which will be very relevant at the moment. Now YouTube and twitch have disabled monetization from vi..
We have finally developed the APINow it will be more convenient for our partner sites to work with us.To update the maximum tariffs for YouTube, an up..
Due to the huge popularity of the partnership services and referral program, we have made a cooperation table. The essence is very simple: more live a..
Our Services for Streamers


Our Services for Content Creators