How to Explain a Modded Minecraft Pack on Stream
Start with the stream's goal, not the mod list
It's hard for a beginner to take in a pack when the broadcast begins with a long list of mods. The names blur together quickly, and the viewer doesn't understand why they should remember each one. So first explain what will change in the game and what path lies ahead.
State a simple goal for the episode. For example: show the first automated resource processing, explore a new dimension, build a secure base, or get through the opening stage of a tech chain. The goal doesn't have to cover the whole pack. One clear outcome is enough for a single stream.
At the start, say which Minecraft version you're using, which loader you've chosen, which mods are needed for the core mechanic, and what the viewer will see during the stream. If the pack is large, set the episode's boundaries: today you're covering the first stage, not every recipe and feature in the modpack.
A good intro answers three questions: what this pack is, how it differs from the vanilla game, and what will get done in this episode. Instead of saying "now we'll tackle resource automation through energy and item transfer," you can say: "we'll build a system that automatically handles repetitive material processing."
Show what the pack is running on
It's best to explain the term "loader" right away and then show it in the interface. It's the tool that lets Minecraft connect modifications of a certain format. For a beginner, naming two common options is enough: Forge and Fabric. They aren't the mods themselves; they enable them to run. A modpack, meanwhile, can include the loader, mods, settings, and additional dependencies.
Before starting the game, open the launcher and show the profile you're going to launch Minecraft with. Usually you need to select an installation or profile marked Forge or Fabric, then click the launch button. Menu item names can vary by launcher, so say not just the button's name but its purpose: "here the game profile is selected, which will load the modifications."
After launching, show the Mods button on the main menu if it's available. In Forge, the mod list usually opens through a separate item on the main screen. In Fabric, whether such a list exists depends on the auxiliary mods installed, such as Mod Menu. If the list doesn't appear, don't call it an error without checking: the loader itself may be working fine, and there's simply no convenient menu.
Don't promise that the same mods folder will run on any game version. Forge and Fabric use different formats, and mods, dependencies, and settings must match the Minecraft version and each other. On stream, it's enough to show your configuration and explain that it needs to be replicated without mixing files from different loaders.
Split the pack into clear groups
The full mod list is useful for your preparation, but it doesn't have to appear on screen in the first few minutes. Divide it by role. Some modifications add blocks, items, and game mechanics. Others change world generation. Others improve the interface, show recipes, or help with performance. Libraries and dependencies sit apart—they're nearly invisible during play but essential for other components to launch.
A mod and a pack aren't the same thing. A mod adds a single change or system. A pack, or modpack, combines several mods, settings, and sometimes additional files for a shared goal. A dependency can be compared to a technical foundation: it may not add a noticeable block, but without it the related mod won't load.
Show a mod on screen when it helps explain an action. If you've opened the recipe for a mechanical press, name the mod that adds that block. If you can see a list of items and a search bar nearby, explain that this is an interface for viewing recipes, not a separate game goal.
Prepare a short cheat sheet for yourself. It's enough to note the pack's main goal, the key mods, the auxiliary interface modifications, dependencies, possible conflicts, and the current version's limitations. That way you won't mix up cause and effect during the stream.
Pick one end-to-end pack example
To keep the explanation from breaking into separate tips, pick a working example in advance and carry it through the whole first hour. For example, this could be a learning pack for Minecraft Java Edition on Forge with Create, Farmer's Delight, and JEI. In this example, Create handles mechanical devices, Farmer's Delight adds food mechanics, and JEI helps find recipes. The compatibility of these mods needs to be checked for the specific game version before the stream.
Tell the viewer: "Today we won't go through the whole modpack. Our goal is to gather starting resources, find the recipe for the first useful mechanic through JEI, and build a simple working Create unit. We'll show Farmer's Delight as an additional food system, but we won't dive into its advanced recipes."
This example gives a clear chain. First the viewer sees a normal survival start, then gets familiar with the new interface, then finds a recipe and builds a modified block. At the end you show the result in action. Even if your pack has different mods, keep the same principle: base resource, recipe search, intermediate item, working mechanic.
Don't state the exact recipe composition in advance if it depends on the version or configuration. Better to open it in the current interface and say: "we're looking at the recipe for this exact pack; in another version the set of components may differ." This both teaches how to verify information and reduces the risk of giving the viewer wrong instructions.
Show the viewer the first hour's route
In a large pack, a beginner easily gets lost among dozens of items. So at the start, show the route for the next hour. You can display it as a short on-screen caption or say it aloud: "first we check the pack, then create a world, gather starting resources, go over JEI, build the first Create unit, and wrap up."
First 5–10 minutes: goal and interface
Start with the working profile in the launcher and show where Forge or Fabric is selected. After launching, open the main menu and, if available, the Mods list. Don't read every name in a row. Find the example's main components in the list and explain their role in one sentence.
Comment on your actions like this: "I'm opening the mod list not so you memorize every line. Right now we're checking that the loader sees Create and JEI. Create will add the episode's main mechanic, and JEI will help find recipes."
10–20 minutes: creating a world and starting resources
Create a test or working world and say exactly what needs to be gathered for the next stage. Don't name resources without a reason. If you need wood, stone, and food, tie them to actions: wood will let you make basic tools, stone will speed up mining, and food will keep you alive during preparation.
Show that the pack doesn't replace the normal Minecraft start. This is a useful reference point: the viewer sees which elements are familiar and which were added by mods.
20–35 minutes: getting to know JEI
Open your inventory with the E key, if that binding hasn't been changed in the settings. On the right, a list of available items is usually displayed, with a search bar at the bottom. Type the name of the block you need, or part of it. Hover over the item, pause on the tooltip, and only then open the recipe.
Talk through the route on screen: "here's the search bar, here's the list of found items, and after clicking, the recipe composition opens. Right now I'm not guessing ingredients or recalling them from memory—I'm checking the recipe in the installed version." In JEI, viewing a recipe and the list of uses is often tied to separate keys, but their bindings can change. Show the on-screen hint and, if needed, open the controls settings.
35–50 minutes: building the first mechanic
Choose one block or a simple Create contraption. First show the finished recipe, then place the components in the crafting table or the required interface. While building, explain the meaning of each stage rather than every item movement: "this component is needed to transfer mechanical motion, and this block will handle the processing."
If starting it requires an additional condition, show that separately. For example, place the mechanism on a flat surface, connect the necessary part of the system, and check whether its interface has changed. Don't move on to the next item until the viewer has seen that the first one actually works.
50–60 minutes: result and recap
Show the working contraption larger, close unnecessary windows, and give viewers time to look at the blocks. Then repeat the chain: "we chose a goal, found the recipe through JEI, built the intermediate components, installed the mechanism, and checked that it works." At the end, name the next stage, but don't immediately open several new systems.
Comment on the interface following the viewer's gaze
A beginner sees more elements on screen than they can take in. So comment not only on the action but on where the needed information is located. A handy formula is: "what opened—where it is—what we're looking for now—what we conclude."
For example: "the JEI item list appeared on the right. The search is at the bottom. I type the name of the press, then click its icon. In the window that opens I see the recipe and check which components are already in the inventory." After that, close the extra window and show the result in the world.
When opening the mod list, say where the cursor is pointing and what the selected line means. If you open settings, don't leave the viewer staring at a long list of parameters. Name only the item you're changing and explain its effect in plain words.
In the inventory, it helps to hover the cursor over an item so the tooltip has time to appear. If the text is small, increase the interface scale in the video settings or zoom in on the capture area. After opening a recipe, don't switch away right away: give a few seconds to look at the components, then repeat their purpose out loud.
Don't narrate meaningless clicks. The phrase "I open the inventory, move an item, close the inventory" doesn't explain the mechanic. Better to say why the item is chosen, what problem the block solves, and what will change after it's placed.
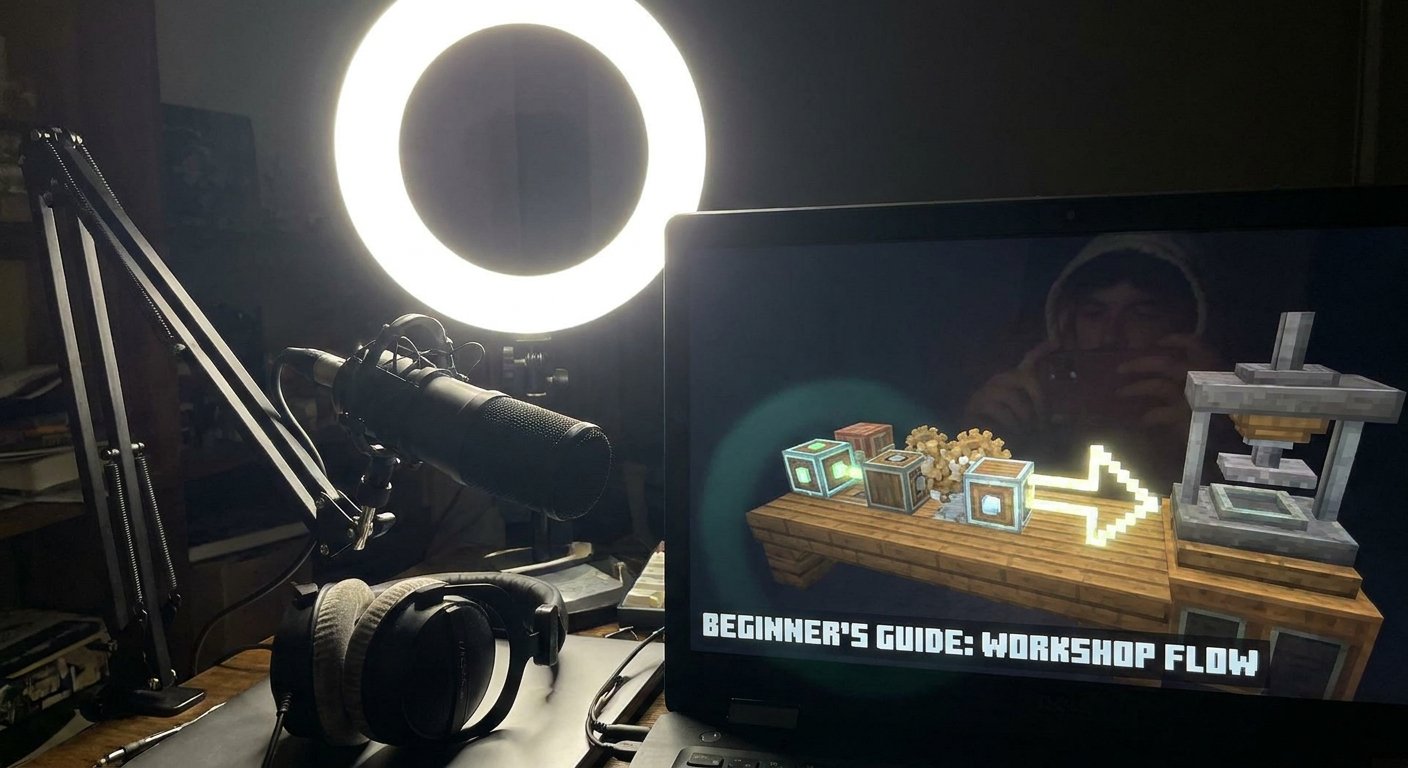
Show the mechanic through one complete example
For the end-to-end example, use the same pattern at every stage. First state the goal, then open the required interface, find the item, perform the action, and check the result. That way the viewer sees the connection between a decision and a click.
With the Create example, the commentary might sound like this: "Our immediate goal is to get the first mechanism for processing materials. I open the inventory and look for the press in JEI. Here's the recipe for the current version. Some components are already prepared; we'll create the rest now. After placing it, it's important not just to set the block but to check whether it's receiving the necessary mechanical motion. If there's no result, we'll look at the connection and the operating conditions."
After crafting the item, show it in the inventory, hover the cursor over the name, and only then move it into the world. Point out the placement spot: "I'm placing the block here because the working part of the system will run alongside it." Start the contraption and show the change—motion, item processing, or an opened interface, depending on the specific version's mechanic.
In this episode, Farmer's Delight can serve as a short additional example. Open one food recipe, show which familiar resources got a new use, and return to the main goal. Don't turn every item you find into a separate topic.
If the mechanic doesn't work, don't hide the problem. Note what's already been checked: the recipe is found, the block is placed, the required components are present. Then check the operating condition one at a time. This kind of troubleshooting is more useful than silently fixing the contraption off-camera.
Set up your screen for teaching
A modded Minecraft stream should be understandable not just through your voice. Mod interfaces often contain small names, several slots, and long tooltips. Before going live, check whether items are legible, whether panels are visible, and whether your channel's overlay is covering them.
Keep only what helps the current explanation on screen. If you're going over a recipe, don't keep the map, chat, and several windows open at once. If you're showing the mod list, remove extra panels and pause on the relevant line. Switching between screens should have a clear reason.
Prepare a short caption in advance with the Minecraft version, the loader, and the current stage's goal. Don't turn the screen into a wall of text. One line—"goal: first Create mechanism"—is more useful than a long list of commands.
Check the audio separately from the image. Your voice shouldn't get lost behind music, game sounds, or notifications. If you're reading an item description, pause so viewers have time to look at the interface. This matters especially when a recipe with several components appears on screen.
Run a quick pack test before going live
Even if you've already launched the modpack, do a short check in a separate test world before streaming. It doesn't replace getting fully familiar with the pack, but it helps catch problems before viewers show up.
- Launch Minecraft through the same Forge or Fabric profile you'll use on stream and wait for the main menu without errors.
- Open the Mods list, if your configuration provides one, and check that the mods needed for the episode are present.
- Create a test world, enter it, and make sure loading doesn't end in a crash or endless wait.
- Find and load the area where you'll show the key blocks. Check that they place, open their interface, and don't disappear after re-entering the world.
- Open JEI or another installed recipe viewer, find the episode's main items, and check their recipes.
- Build at least one key item using the recipe you found, then check its use in the world. Seeing an icon in a list isn't enough: the full path from ingredients to result matters.
- Check the interface scale, tooltip legibility, game capture area, microphone audio, and that no extra windows are on your desktop.
- Back up your working world before changing the configuration or mod composition.
If a recipe doesn't show up, first check the name, the game version, and the interface filters. Don't add a new mod at random right before going live: it may require a dependency or conflict with components already installed.
Answer chat questions by checking
A repeated question doesn't always mean inattention. The viewer may have joined later, missed the explanation, or be using a different profile. First give a short answer, then show the relevant screen. To "what does this block do?" it's enough to name its role. If they ask "how do I get it?", open the recipe and walk through the path together with the viewer.
When a question is about an error, ask them to describe three things: what was done, what result was expected, and what actually happened. Then check the Minecraft version, the loader, the item name, the recipe, and the settings. Don't state the cause confidently until obvious possibilities are ruled out.
A tip from chat may relate to a different version or a different configuration. Say so directly and test the suggestion in the current world. If testing will take a long time, note the question and continue with the planned stage rather than turning the whole episode into file shuffling.
Keep the pace and repeat the route
Explanation should alternate with action. Several minutes of terms is tiring, and silent clicks don't let the viewer understand the logic. Use a short sequence: goal, action, result. Before crafting an item, say what it's for. While placing it, show the operating condition. After starting it, demonstrate what changed.
Every 15–20 minutes, according to the stream plan, take a short pause and recap the progress: "we've already checked the loader, created a world, found the recipe, and prepared the components; now we're connecting the mechanism." This helps those who joined later and doesn't require replaying the whole stream.
Don't try to show all the upgrades at once. First give a simple working version, then note the expansion in one phrase: "later this system can be made more complex, but right now the key is to understand the basic principle." That way a beginner gets a finished result, not a set of unfinished demonstrations.
Quick takeaways before going live
- Choose one goal for the episode and explain it in plain words.
- Show the Forge or Fabric profile, the game version, and the role of the main mods.
- Walk the viewer through the first hour's route: launch, world, JEI, recipe, first mechanic, wrap-up.
- Comment on the interface by location: where the button is, what's open, and why the action is being performed.
- Take one end-to-end example and carry it from resources to a working result.
- Before going live, check the world launch, key block loading, interfaces, and recipes.
- If something goes wrong, note the symptoms and check causes one at a time without changing the whole modpack at once.
The main task of such a stream isn't to list every mod but to guide the viewer along a clear game path. When every action is tied to a goal, a large pack stops looking like a pile of random items and becomes a system you can explore step by step.
Last Articles
What has changed in design and functionality We have updated the website to make working with it faster and more convenient. The main changes affect ..
Good afternoon, I've collected all the news during this time.: 1. The main news is that prices for twitch viewers have been greatly reduced, while Tw..
1. Use promo code "December2025" for a 15% discount for all our viewers2. We have reduced the base prices for our configurator and the most affordable..
Twitch services are working stably, so we are ready to cooperate with squads, resellers, service owners, bot owners, and many others.Individual te..
We have completely updated our Twitch viewer services, and they are now working stably. We only use high-quality IP addresses for the viewers.The ..
Hello everyone! Today, we are announcing a new feature—"Twitch Viewer Configurator". Now, you can customize any plan for your Twitch channel. Choo..
Greetings, I have compiled a guide for streamers, which will be very relevant at the moment. Now YouTube and twitch have disabled monetization from vi..
We have finally developed the APINow it will be more convenient for our partner sites to work with us.To update the maximum tariffs for YouTube, an up..
Due to the huge popularity of the partnership services and referral program, we have made a cooperation table. The essence is very simple: more live a..
Our Services for Streamers







Our Services for Content Creators