Stream delay: causes and setup for Twitch, YouTube, and Trovo
What is called stream delay
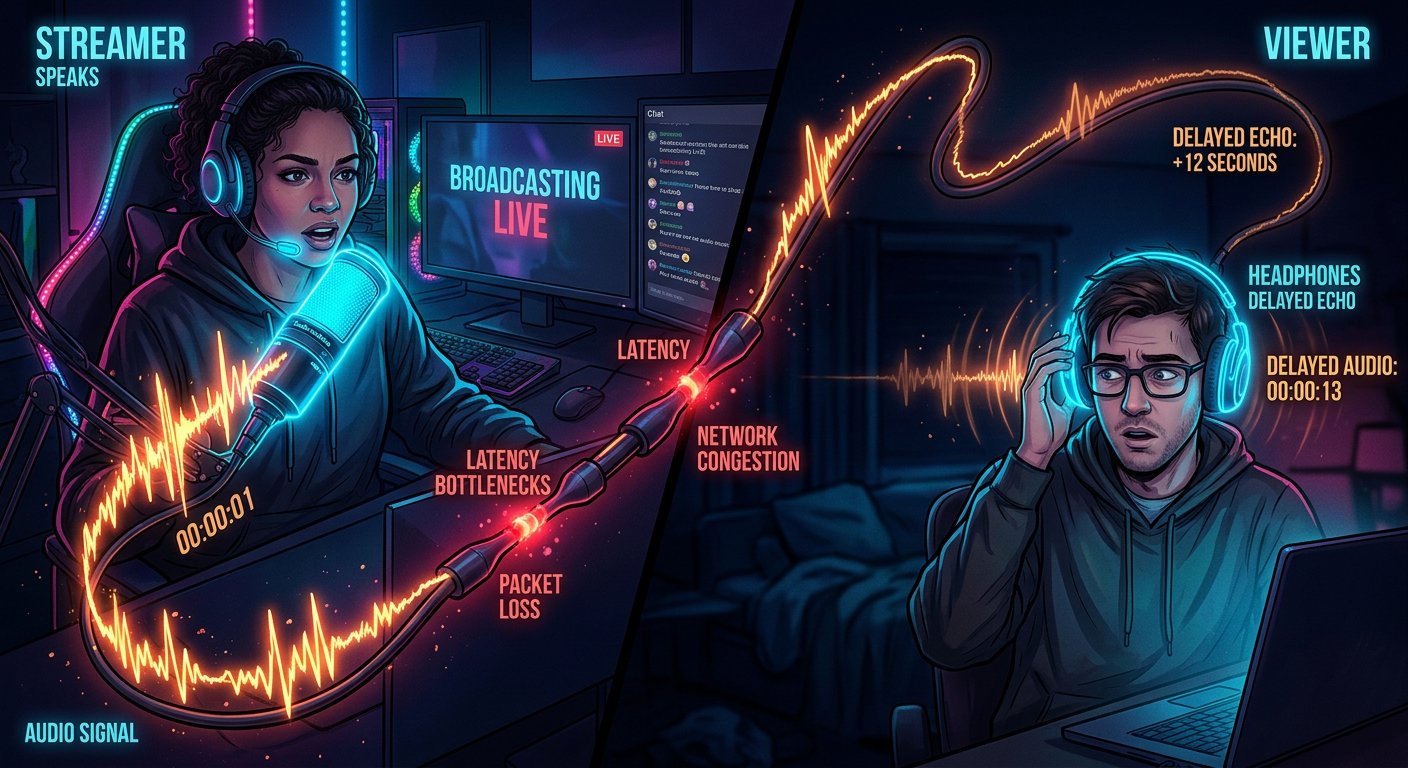
Stream delay is the time between an event in front of the camera and its appearance for the viewer. For example, you said a phrase, and the viewer heard it a few seconds later. This chain includes video and audio capture, signal processing, encoding, sending the stream to the server, the platform preparing the broadcast, and playback on the viewer's device.
Delay doesn't always mean an internet problem. Part of the lag is built into the broadcast mode on the platform itself. Extra time appears due to an overloaded encoder, packet loss, an unstable route to the server, or a buffer in the viewer's player. The chat deserves separate consideration: a message may arrive later than the viewer sees the moment it refers to.
The lower the delay, the more convenient it is to communicate with the audience in real time. But a minimal buffer leaves less room to recover the stream during failures. That's why the mode is chosen based on the broadcast format. For a calm conversation, a few seconds of lag may go unnoticed, but for a game with reactions to messages, a quiz, or a co-stream, the difference becomes significant.
How the platform mode affects the lag
The platform accumulates part of the video before playback in advance. This reserve is called a buffer. A large buffer helps survive brief connection drops without stopping the video, but the viewer sees the broadcast later. A small buffer delivers new frames faster, but the stream becomes more demanding on the stability of the internet for both the streamer and the viewer.
Usually, a normal mode, low latency, and ultra low latency are available. The names and set of features depend on the platform. For communicating with your audience, choose low latency, and ultra low latency only when you need to react to chat quickly. If after switching, viewers see stops, loading messages, or frequent reconnects, go back to a more stable mode.
Automatic buffering can add lag during viewing itself. This happens when data arrives unevenly, the viewer changes quality, returns after a pause, or restores the connection. That's why delay settings are checked not only at the start of the broadcast, but also after several minutes of operation.
How to enable low latency on Twitch, YouTube, and Trovo
It's better to change the mode before an important broadcast begins. After saving the settings, run a short test from another device or ask a viewer to check the broadcast. Compare not only the response time, but also the stability of viewing. The setting in the platform panel is more important than the OBS parameters: the program encodes and sends the stream, but it's the platform that decides how much video reserve to give the player.
Twitch
Open Creator Dashboard, go to Settings, then select Stream. In the section with the latency mode, find Latency Mode and set it to Low Latency. Save the settings if the panel shows a separate save button. After that, start a test broadcast and check it on a phone or another computer that isn't connected to the same network.
Low latency mode on Twitch is designed for communicating with chat, but viewers with unstable internet may experience stops. If complaints come from only one viewer, first ask them to click the button to return to the current broadcast, refresh the page, or lower the quality. Don't change the broadcast mode because of a single problem on the viewer's side.
YouTube
Sign in to YouTube Studio and open Live Control Room. When creating or editing a broadcast, go to the stream settings and find the Latency item. Choose Low latency for a regular interactive broadcast or Ultra low latency if it's important for you to respond to messages as quickly as possible. Check that the selected mode is applied to the desired broadcast, not just to the template.
Ultra low latency on YouTube leaves less room for uneven data transmission. If the broadcast starts buffering more often, use Low latency instead of Ultra low latency. For a calm broadcast without constant communication, you can leave Normal latency: this mode usually handles brief connection problems better.
Trovo
Open Trovo Studio or the creator panel, create a broadcast, and go to the advanced broadcast parameters. Find the item named Latency, Stream latency, or Low latency and select low latency. Section names may differ depending on the panel version, so focus on the broadcast settings themselves, not the profile parameters. If there's an apply button, save the changes before starting the broadcast.
If there's no latency toggle in your Trovo panel, the platform may assign the mode automatically. In this case, you can reduce the lag through stable transmission, a suitable server, the correct bitrate, and checking the viewer's player. After starting, compare the broadcast on several devices: this way you'll understand whether the delay is common to the audience.
Internet stability for the streamer
For broadcasting, not only the maximum upload speed matters, but also its stability throughout the entire broadcast. The connection must sustain the chosen bitrate without sharp drops. If the stream is sent in bursts, part of the data is lost or delayed, and the program and server try to assemble continuous video. As a result, lag grows, dropped frames appear, or the broadcast goes into buffering.
The most reliable option for the streamer's computer is connecting to the router with a network cable. Wi-Fi is affected by distance to the router, walls, interference, and load from other devices. File downloads, video calls, cloud sync, games, and video streaming on the same network can take away upload speed exactly when it's needed for the broadcast.
Before going live, stop unnecessary downloads and check which devices are using the home network. If the problem appears only when several users are working simultaneously, the cause may be channel allocation, not OBS. For regular drops, check the router, cable, and your provider's operation at different times of the day.
A speed test shows the connection state at a specific moment and doesn't replace monitoring the broadcast. Run several checks at short intervals, paying attention specifically to upload. Focus on the lowest stable value, not the best result. The "up to" speed in your plan doesn't mean that figure will hold throughout the entire broadcast.
How to choose bitrate and resolution based on upload speed
Video bitrate shouldn't take up the entire upload channel. Leave room for overhead traffic, audio, load spikes, and the operation of other devices. A practical guideline is to use about half or two-thirds of your stable upload speed for video. If the figure changes noticeably, base your calculation on the lower value.
- With a stable upload of around 5 Mbps, start with a video bitrate of 2500–3000 kbps and a resolution of 1280×720. For a dynamic game, 30 frames per second is often more suitable if the computer can't handle a higher frame rate.
- With an upload of around 8 Mbps, you can try 4000–5000 kbps. Depending on the platform and computer, this suits 720p60 or 1080p30. Choose only one option and test it on a test broadcast.
- With a stable upload of around 12 Mbps, you can consider 6000–7500 kbps and 1080p30 or 1080p60. Before that, check the maximum bitrate of the chosen platform and leave room for the network.
These are starting guidelines, not universal requirements. The exact limit depends on the platform, encoder, and format. If the platform specifies its own range, it takes priority. With unstable upload, it's better to lower the bitrate and resolution than to try to maintain high quality at the limit of your channel.
Most live broadcasts use a constant bitrate, or CBR, if the platform settings provide for it. Set the keyframe interval according to the platform's requirements. If there's no specific instruction, an interval of 2 seconds is often used, but for Trovo and other platforms, check the current recommendations in the broadcast panel. An incorrect interval can interfere with video recovery and quality switching.
High resolution by itself doesn't create network delay, but it increases the load on the encoder and channel. If the system is running at its limit, switching from 1080p60 to 1080p30 or from 1080p30 to 720p60 often gives a more stable result. For a talk show, clean audio and the absence of stops are usually more important than the maximum amount of detail in the frame.
Broadcast server and route to the platform
After encoding, the stream is sent to the platform's server. Between the computer and this server, there are several network nodes, so the quality of the route also affects latency. Even a good plan doesn't rule out congestion at individual nodes, maintenance, or unstable communication with a specific destination.
The geographically closest server isn't always the best. When choosing, evaluate not only the distance, but also the evenness of transmission, the absence of reconnects, the percentage of dropped frames, and the stability of the result throughout the test. A server that gives slightly higher response time but doesn't lose data is better than an option with short response time and constant drops.
How to test servers
If the platform provides a list of servers, open the Settings section in OBS, then Stream, and look at the Server field after selecting the desired service. On Twitch, you can compare servers from this list. On Trovo, use the available connection points or the server address shown in the creator panel. YouTube more often chooses the route for the incoming stream itself, so manual server comparison may not be available there.
- Choose the same resolution, frame rate, encoder, and bitrate for all tests.
- Start a test broadcast on the first server and leave it running for several minutes to see performance not just in the first seconds.
- Open OBS statistics via the View menu, Docks, Stats. Note dropped frames, reconnects, rendering and encoding skips.
- Repeat the check for other servers under comparable conditions: if possible, at the same time of day and without downloads on the home network.
- Compare the entire test, not just a single best moment. Choose a server without reconnects and with the minimum share of dropped frames.
For an additional check, you can find out the server address or name from the connection settings and run the ping command. On Windows, use ping -n 30 server-name, and on macOS and Linux, use ping -c 30 server-name. Packet loss is shown in the final line. The traceroute or pathping commands help you see the problematic part of the route, but they don't replace a test with actual RTMP transmission: the server may handle ICMP requests and the video stream differently.
The main indicator remains the broadcast statistics. If the percentage of dropped frames due to the network grows in OBS, reconnects appear, or the stream is sent in bursts, the server and route can't be considered successful. If all available servers show the same problems, the cause may be your provider or the platform itself. Don't switch servers during an important broadcast unless necessary: reconnecting will temporarily increase lag and may interrupt the stream.
How the computer affects delay
Before sending to the platform, video needs to be captured, processed, and encoded. If the computer can't complete any of these operations on time, delay appears even before the stream goes out to the internet. In OBS statistics, this shows up as rendering or encoding skips. A good communication channel won't fix the situation if frames are generated too slowly.
Rendering skips are more often related to the load on the graphics card. A game can take up almost all available resources, and OBS won't have enough power to capture the scene. Limit the frame rate in the game, lower heavy graphics settings, and disable effects that the viewer can't see. Free graphics card resources are more important than the maximum frame rate that only you see.
Encoding skips indicate an overloaded processor or hardware encoder. Close unnecessary programs, extra browser tabs, background syncs, and recording apps. Simplify the scene, remove heavy filters and animations. For software encoding, choose a faster preset or reduce the resolution and frame rate.
A hardware encoder moves part of the work to the graphics card, but it doesn't eliminate the load on the system. If the problem appeared after adding a camera, filter, browser source, or animated alert, temporarily disable that element and compare the statistics. Check changes one at a time so you understand the cause of the result.
Monitor the temperature and behavior of your computer at the end of the broadcast. When overheating, component frequencies may drop, so a broadcast that was stable at the start gradually begins to drop frames. Don't run rendering, archiving, and other heavy tasks during the stream.
How to figure out where the delay appears
First, find out whether the broadcast lags equally for most viewers. If the problem appeared for everyone at the same time, check the platform's latency mode, connection state, chosen server, and OBS statistics. If only one viewer complains, the cause is most likely in their network, device, or player.
Then divide the skips into several types:
- rendering skips indicate insufficient graphics card resources to prepare the scene;
- encoding skips mean the processor or hardware encoder can't keep up with processing the video;
- loss of sent frames is related to the network, the route to the server, or too high a bitrate;
- a smooth increase in lag with normal statistics may be related to the platform's or player's buffer.
For an approximate measurement, place a screen with a stopwatch or clock in front of the camera, say a short phrase, and simultaneously note the time. On another device, open the broadcast and record the moment the phrase appeared. It's better to use mobile internet or another network to exclude the influence of local cache. Such a test shows the total delay between the scene and viewing, not just the path to the server.
Check several devices and networks. If on a phone in a mobile network the broadcast lags the same as on the viewer's computer, the problem is most likely not limited to their Wi-Fi. If the lag gradually grows, ask the viewer to click the button to jump to the current broadcast and compare the result after the buffer reset.
A chat message is only suitable for a rough check. It goes through a separate channel and may be displayed with its own lag. For a more accurate comparison, use a visible timer, a clap in front of the camera, or a pre-agreed visual signal.
What viewers can do
Part of the delay appears after the stream has left the streamer's computer. The result is affected by the viewer's internet speed, Wi-Fi stability, chosen quality, browser, app, and device power. With a weak connection, the player accumulates a buffer to avoid stopping the video, so the viewer sees the broadcast later.
Ask the viewer to check several actions:
- click the button to return to the current broadcast if viewing has fallen noticeably behind;
- refresh the page or restart the app;
- choose the quality manually if automatic mode constantly changes resolution and pauses the video;
- lower the quality during stops and check viewing without parallel downloads;
- close extra tabs and apps that use the network or device resources;
- compare viewing in another browser, app, or on another device;
- temporarily disable VPN if the broadcast loads unstably specifically through it.
If the video arrives on time but plays choppy, the cause may be decoding, overheating, or device settings. On an old smartphone, TV, or computer, lower quality and closing background apps sometimes help. When the problem exists for only one viewer, there's usually no need to change the settings of the entire stream.
How to reduce delay without losing stability
Start with the platform: enable the appropriate low latency mode and check whether the player is accumulating extra buffer. Then set up the network: use a cable, remove unnecessary load, and check the route to the chosen server. After that, move on to the computer so you don't try to fix a network problem with encoder settings.
If there are encoding skips, reduce the load on the processor or switch to a properly working hardware encoder. If rendering skips appear, reduce the load on the graphics card: simplify the game, limit the frame rate, and check the scene sources. If frames are dropped during transmission, match the bitrate to the platform's recommendations and your upload channel's capabilities.
Don't change all parameters at once. First, record the initial settings, then change one indicator and run a new test. This way you'll understand what exactly affected the result. A stable stream with slightly lower resolution is usually more convenient for communication than a broadcast with high quality that regularly freezes and goes into buffering.
Quick conclusions: what to do step by step
- Determine the broadcast format and enable the appropriate low latency mode in the Twitch, YouTube, or Trovo panel.
- Connect the computer to the router with a cable and stop downloads, cloud sync, and other tasks that use upload bandwidth.
- Check your stable upload speed several times and calculate the bitrate based on the lower result, leaving room for the network.
- Choose a resolution and frame rate that the computer and channel can sustain without skips.
- Test the available servers under identical conditions and choose the option without reconnects and with minimal frame loss.
- Check rendering, encoding, and transmission skips separately in OBS.
- Measure the delay on another device and in another network to separate the streamer's problem from the viewer's problem.
- Change one parameter at a time and run a new test broadcast after each change.
Last Articles
What has changed in design and functionality We have updated the website to make working with it faster and more convenient. The main changes affect ..
Good afternoon, I've collected all the news during this time.: 1. The main news is that prices for twitch viewers have been greatly reduced, while Tw..
1. Use promo code "December2025" for a 15% discount for all our viewers2. We have reduced the base prices for our configurator and the most affordable..
Twitch services are working stably, so we are ready to cooperate with squads, resellers, service owners, bot owners, and many others.Individual te..
We have completely updated our Twitch viewer services, and they are now working stably. We only use high-quality IP addresses for the viewers.The ..
Hello everyone! Today, we are announcing a new feature—"Twitch Viewer Configurator". Now, you can customize any plan for your Twitch channel. Choo..
Greetings, I have compiled a guide for streamers, which will be very relevant at the moment. Now YouTube and twitch have disabled monetization from vi..
We have finally developed the APINow it will be more convenient for our partner sites to work with us.To update the maximum tariffs for YouTube, an up..
Due to the huge popularity of the partnership services and referral program, we have made a cooperation table. The essence is very simple: more live a..
Our Services for Streamers








Our Services for Content Creators